
Zoom Rooms is a service used by OVA to make hybrid-meetings easier to facilitate for our community. OVA currently has 3 meeting spaces that are equipped with Zoom Rooms:
- Berger Auditorium
- East Rec Center (Upstairs, Main Room)
- Aspen Conference Room (OVA Admin Office)
You can utilize a Zoom Room with a meeting ID and passcode from your own Zoom account, but the process is most seamless if you schedule your Zoom meeting with OVA’s Event Coordinator using OVA’s Zoom account.
Setting Up Your Zoom Room Meeting
Schedule your meeting with OVA’s Event Coordinator using OVA’s Zoom account
OVA’s Event Coordinator may be reached by sending an email to anita.roraus@oakmontvillage.com, or by calling the OVA Admin Office, 707-539-1611, and dialing extension 3.
Schedule your meeting on your own Zoom account
If you opt to use your own Zoom account, make sure to bring your meeting ID and passcode to connect your meeting to OVA’s Zoom Room.
Click Here For A Printable / Downloadable Version Of These Instructions
Starting & Managing a Zoom Room Meeting
On the AV Rack:
- Turn on AV System
- Turn on room display/projector
- Lower Screen (must be done manually in Berger Center)
- Select the Zoom/Camera source
On the facility’s iPad:
- Open the Zoom Room Controller app
Note: If the app isn’t working or is asking you to “Retry” the connection, please see the section below titled, Troubleshooting Zoom Rooms. - Signing into your meeting:
- Meetings Scheduled with OVA’s Zoom account:
- Select your meeting on the app’s dashboard from the list of meetings occurring that day.
- Select the blue Start button
- Meetings Scheduled with your own Zoom account:
- Select the blue “Join” button
- Enter in your meeting ID
- Enter in your passcode, if applicable
- Meetings Scheduled with OVA’s Zoom account:

- Managing the meeting:
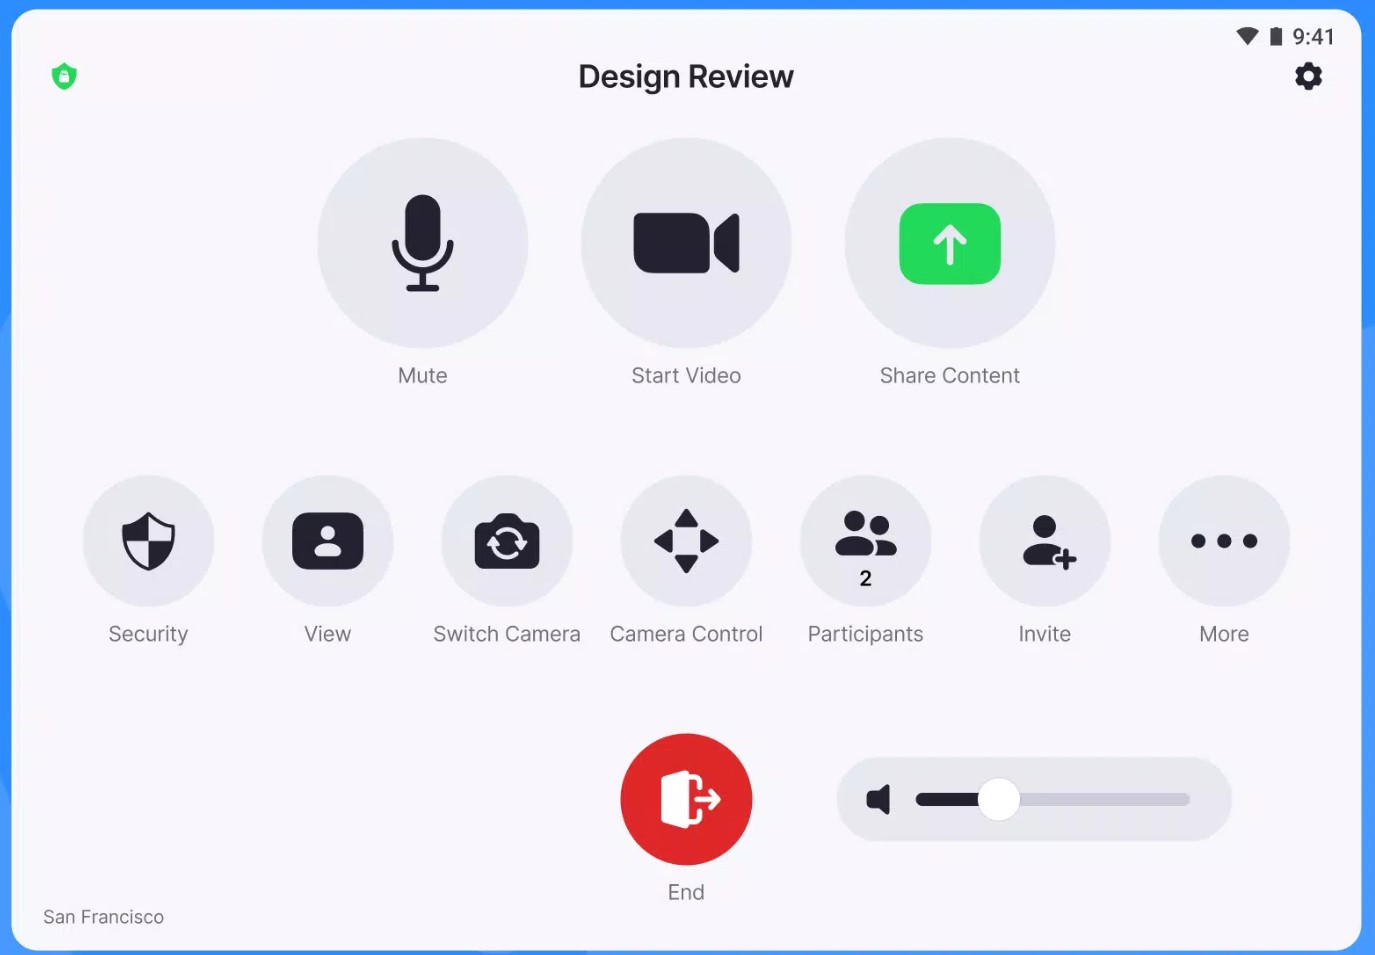
Everything you need to manage a Zoom meeting will be present in the Zoom Room Controller iPad app after you sign into your meeting.- Mute: Stops sound from being broadcasted from Zoom Room into Zoom meeting, i.e., people who are not in the room will not hear sound captured by facility microphones.
- Start/Stop Video: Stops or starts video broadcasted from Zoom Room into Zoom meeting using cameras installed at any given facility.
- Share Content: Selecting this will allow you to share the screen of the iPad hosting the Zoom Room Controller app, and it will also provide instructions on how to share the screen of other devices, i.e., a laptop or cellphone of someone in the room or joining by Zoom.
- Security: Selecting this button will reveal many options, the most frequently used being the Waiting Room which you can toggle on or off.
- View: This button allows you to toggle between Gallery, Thumbnail, and Speaker view for the Zoom Room.
- Camera Control: This button reveals a menu with controls to pan, tilt, and zoom the currently selected facility camera. The Extron app, available on the iPad and on the AV-rack display, is still required for presents, switching between cameras, and fine tune control of camera movements.
- Participants: Selecting this button will reveal all options needed for participants, including settings to mute, stop video, admit from waiting room, and more.
- Invite: This is a handy menu for inviting people to the meeting. Simply enter an email address and an invitation will be sent.
- More: Selecting this button will reveal additional options, such as settings to increase the size of Closed Captions.
Troubleshooting Zoom Rooms

iPad cannot connect (in Zoom Rooms Controller app)
If you open the Zoom Room Controller app and receive a message about not being able to connect, and possibly a button labeled Retry, then it is likely the computer for the Zoom Room is asleep. Follow these steps to wake up the computer:
- Locate the keyboard for that facility.
- Make sure the keyboard is turned on, if it is battery-powered, i.e., wireless.
- Press the spacebar on the keyboard 3 – 5 times.
- Take notice if the computer for the Zoom Room makes any noise or illuminates any lights.
- It may take 1 – 5 minutes for the computer to fully wake up.
- Wait for the computer to fully wake up.
- Select the Retry button in the Zoom Room Controller app on the facility iPad.
If the iPad does not reconnect, and show the Zoom Room Controller dashboard, then please try the troubleshooting steps for a problem on the computer below.
Computer disconnected (displayed on projector-screen)

If you turn on the AV-rack and projector, with the Zoom / Camera source option selected, and there is a message on the screen asking you to Pair with a Controller possibly accompanied by a 6-digit code, then the computer for the Zoom Room is likely to be logged in to the wrong account.
Follow these steps to log into the correct account for Zoom Rooms:
- With the Zoom / Camera source selected, check if the room’s name is shown in the upper-left corner of the projector-screen display.
- If the name of the room is in the upper-left corner, then the room is connected.
- If the name of the room is not in the upper-left corner, and instead you see the words “Sign In,” then move on to step 2.
- Locate the keyboard for that facility.
- Make sure the keyboard is turned on, if it is battery-powered, i.e., wireless.
- Press the Windows key in the lower-left corner of the keyboard.
Step 4
- Select the account icon
- Select the Zoom Rooms account
Step 5 & 6
- Enter the password and log in.
- The password is printed on the keyboard.
- Give the account a few moments to load, Zoom Rooms should launch automatically, once it has launched, try reconnecting on the iPad in the Zoom Rooms Controller app.
Enabling Live-Transcription (Closed Captions)
To enable closed captions, follow these steps:
On the facility’s iPad:
- Make sure you’re in the Zoom Room Controller app
- Make sure you have started your meeting
- Select Participants
- Select More
- Select Enable Live-Transcription
Closed captions will now be present whenever anyone speaks into the microphone connected to the Zoom Room. To change the size of closed captions, navigate to back to the main meeting controls, and select the ellipses button (…) labeled More. In the following screen select Closed Captions to adjust the size of closed captions on the screen.
IMPORTANT NOTE: If you’re scheduling your meeting with OVA’s Zoom account, then live-transcription is automatically enabled, and you can adjust the size of the closed-captions by selecting the More button during your Zoom meeting. But if you’re using your own Zoom account, then live-transcription must first be enabled in your account settings in a web browser by visiting https://zoom.us and logging into your account. Here are instructions from Zoom on that procedure:
https://support.zoom.us/hc/en-us/articles/8158289360141-Enabling-automated-captions
Sharing Your Screen
Selecting the Share Content button in the Zoom Room Controllerapp will display instructions on how to share your screen on the iPad. Methods for sharing your screen are different depending on the screen of the device you’re sharing. You may follow the instructions displayed in the Zoom Room Controller app to share your screen in a Zoom Room, even if you don’t have a Zoom meeting scheduled.
Visit this page on the Zoom website for more information and videos on sharing your screen:
https://support.zoom.us/hc/en-us/articles/201362153-Sharing-your-screen-or-desktop-on-Zoom
No Signal Errors
If an audio-visual source is selected (Cameras, Laptop, Blu-ray/DVD, TV, Solstice), but no image appears, look for the words “No Signal” followed by a number, in one of the corners of the screen. For example, “No Signal 3” or “No Signal 5.” Provide this information to OVA staff and they will be able to power cycle the appropriate audio-visual source in the AV rack.
No signal errors will also show up if you select the Camera option, but the computer in the AV rack is off. Contact OVA staff to ensure the AV rack computer is on.